Bhyma's Tutorial made by the program, Corel X2, Paint Shop Pro.
Tubes also Bhyma.

File to save in PDF format..::Here::..

Preparation:
Foreground #680813,
and background#ba6365.
Step 1
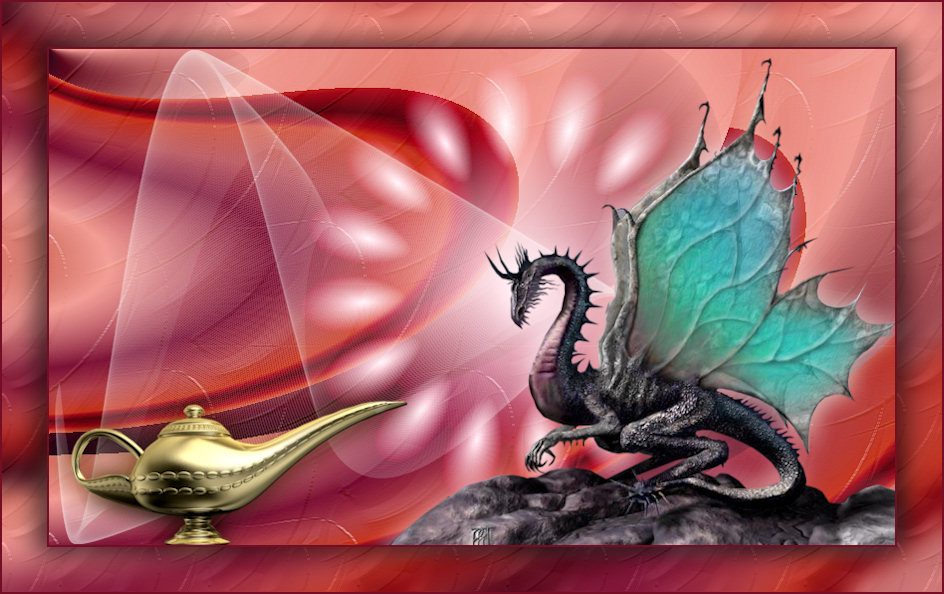
Open the background image, fondodragon.jpg.
Layers - New rater layer.
Flood fill with the background color.
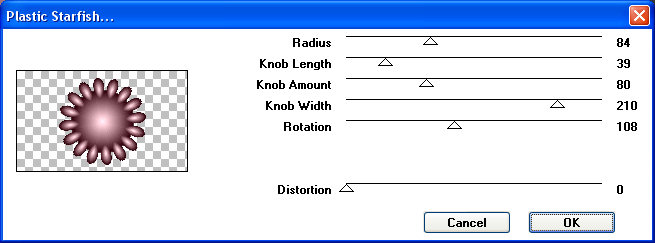
Effects - plug-in - VM Natural - Plastic Starfish, with settings shown below::
Activate the layer palette and change blend mode to Screen, Opacity 100%.
Rename this layer as "Starfish"
Open : bhyma_mancha-de-metal_09_09.pspimage.
Edit copy - close original
Edit - paste as a new layer.
Image - Resize 85% all layer Unchecked.
Place in the center of the sphere, approximately.
Rename this layer as "mancha"
Step 2
Layers - new raster layer.
Effects - plug-in - DragonFly - Sinedots II, con el preset dragon.
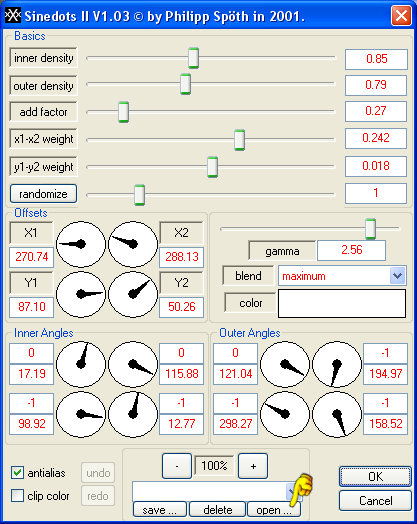
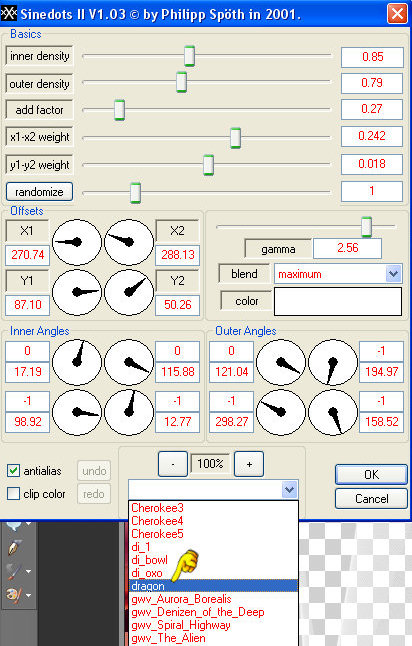
In Open, you can locate the folder where you saved the preset: PSP_PluggersPresets.cfg,
then looking dragon on the list and you have values.
Opacity 50%.
Step 3
Open bhyma_lampara-magica_09_09.pspimage.
Edit copy - close original
Edit - paste as a new layer.
Image - Resize 50% all layer Unchecked.
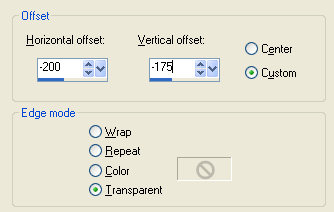
Effects – image effects - offset with settings shown below:
Layers - Duplicate.
Activate the original layer, Rater 4.
Adjust - Blur - Gaussian blur- radius 12.
Activate the layer palette and change blend mode to Multiply.
Activate the copy,Copy of Raster 4.
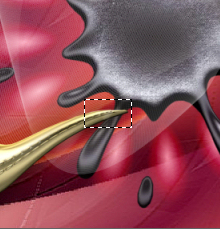
Select a rectangle on top of the lamp to make the smoke.
Selections - Promote selection to layer.
Selections - Select none.
Effects - plug-in - Eye Candy 5 Nature -Smoke, with preset: dragonSmoke.f1s
Paso 4
Open bhyma_dragon_09_09.pspimage.
Edit copy - close original
Edit - paste as a new layer.
Image - Resize 80% all layer Unchecked.
Place it on the left bottom side.
Layers - Duplicate.
Activate the original layer, Raster 5.
Adjust - Blur - Gaussian blur- radius 12.
Activate the layer palette and change blend mode to Screen.
Open :cesped.pspimage.
Edit copy - close original
Edit - paste as a new layer.
Place on the stone, see the sample image.
Duplicate this layer and move to cover the stone under the dragon.
Layers - Merge down, twice.
Step 5
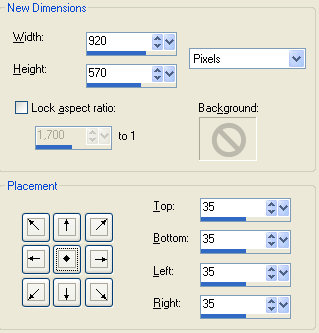
Imagen - Canvas sice- with settings shown below:
Activate the top layer, can not merge the layers, until we make the animation.
Layers - New raster layer.
Selections - Select All.
Activate fondodragon.jpg, Edit - Copy.
Edit - Paste into selection.
Adjust - Blur - Gaussian blur - radius 12.
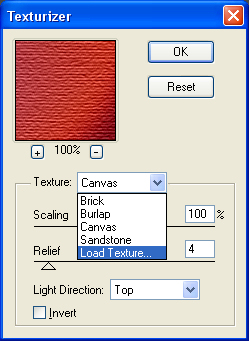
Effects - plug-in - Texture - Texturizer - texture: texture2.psd.
Selections - Modify - Contract 36 px.
Click on the delete button of your keyboard.
Effects - plug-in - Eye Candy 5 Impact - Perspective Shadow - preset: dragonbhymaPS.f1s.
Layers - New raster layer
Activate the brush tool, and stamp the brush: textobhyma.
Sign or watermark to.
If you do not want to do animation, you can merge all, and save it as jpg.
Animation:
Step 1
Activar the layer rename "mancha"
Layers - Duplicate.
Raster "mancha", Blend mode Multiply, opacity 50%.
Copy of raster " mancha", Blend mode Screen, Opacity 100%
Edit - Copy special - Copy merged.
Edit - Paste as new layer.
Step 2
Activate the layer rename "Starfish"
Layers - duplicate.
Raster: "Starfish", Blend mode Dodge.
Copy of raster "Starfish", Blend mode - Screen.
Raster "mancha" opacity up to 100%
Edit - Copy special - Copy merged.
Edit - Paste as new layer, in the image above.
Step 3
Activate the layer Copy of raster "mancha", change the blend mode to Hard light.
Activate teh layer "Starfish", change the blend mode to Overlay.
Edit - Copy special - Copy merged.
Edit - Paste as new layer, in the image above.
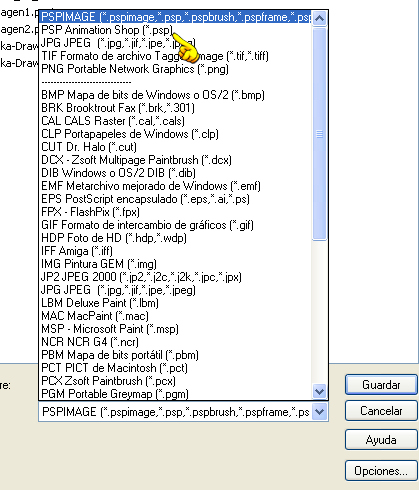
File - Save As, PSP Animation Shop.
Open the Animation Shop and locate the image you just saved.
Select all frames and change frame properties to 20.
Save as gif image.