This lesson was written by Bhyma on August 30 2009 in the Spanish version of PSP X2
Script Outlook Express/Windows mail , you can see the..::Script::..
you can download it..::Here::..
Materiales
Preparation:
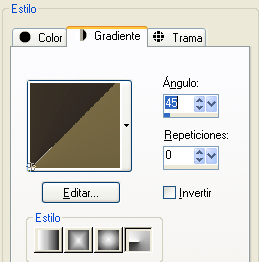
Put your foreground color to a light color, I took #776943, and the background color to a darker one, I took #312a23
Change the foreground color into gradient:


Step 1
Open a new image
File – new – new image:850 X 580 px.
Flood fill with the gradient
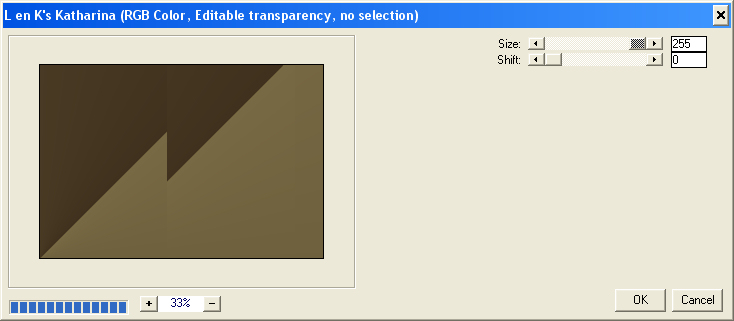
Effects - plug-in - L&K Katharina. 255, 0.
Effects - plug-in - Alien Skin - Snap Art - Stylice, preset: Bright Colors,more lines.
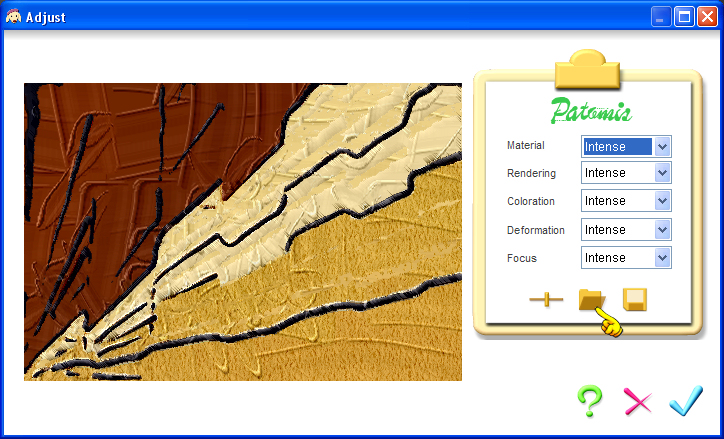
Effects - plug-in - Virtual Painter 4 - Filter:Impasto, Material: Stucco, Adjust tecnique, and choose my preset estilo_bhyma.vpo, here:
Step 2
Layers - new raster layer
Selections – load/save selection from disc- load selection from disc and choose my selection: estilo.PspSelection.
Change your background into a this color: #edb543.
Flood fill your selection with the background color.
Selections – deselect all
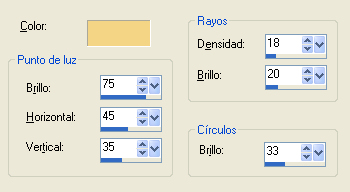
Effects - Iluminations effects -Sunburts and choose my Preset_Sunburst_estilo_bhyma.PspScript.
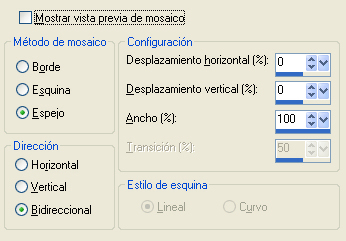
Effects – image effects - seamless tiling:
Activate the layer palette, opacity: 100%, blend mode: Multiply.
Step 3
Layers - new raster layer
Import brush:estilo.PspBrush. Size 150, color #522b11.
Activate the brush tool and choose my brush:estilo
Stamp the brush top right with a dark color, see the sample image.
Layers - merge – merge visible.
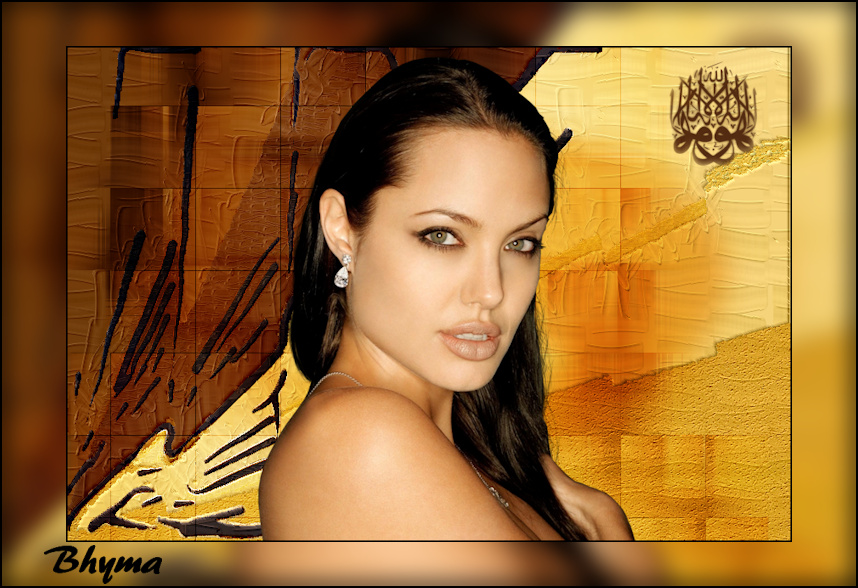
Activate your tube. Edit - copy and paste as a new layer
Image – resize with 75%. resize all UNchecked
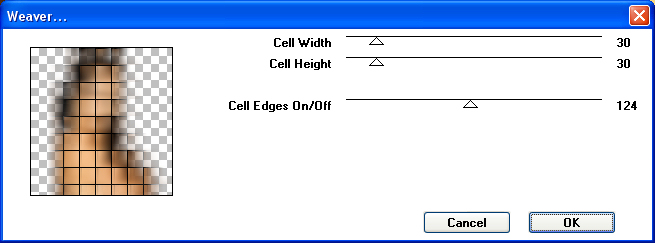
Effects - plug-in - Toadies - Weaver with the following settings:
Effects – image effectss - off set , Horizontal 150, Vertical 0.
Duplicar la capa.
Effects – image effectss - off set:- Horizontal -300, Vertical 0.
change the blend mode of this layer to soff light
Layers - merge – merge visible.
Step 4
Activate again the tube.
Edit - copy and paste as a new layer
Image – resize with 65%. resize all UNchecked
Effects – image effectss - off set: Horizontal 35, Vertical - 80.
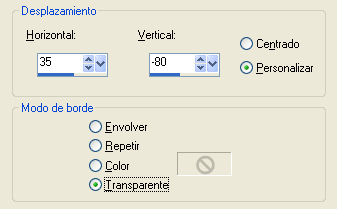
Image add borders 2 px black color, simetric.
Layers - duplicate
Activate the layer below.
Adjust - blur – Gaussian blur: radius: 12.
Activate the top layer.
Image – resize with 85%. resize all UNchecked
Image add borders 2 px black color, simetric.
Save as a jpg.
I hope you have a little fun with this simple tutorial.
If you need to ask something you can write here.