Tutorial made by Bhyma with the program PSP Photo X2.
You can do this with any version of the program.
To save PDF file ..::Here::..
Filters needed:
Toadies
Nik Software
AAA Frame
Materials :
Tubes in psd files..::Here::..
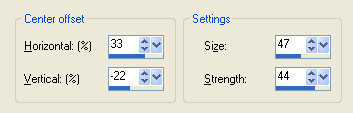
Foreground #f7cf7a.
Background #935811.
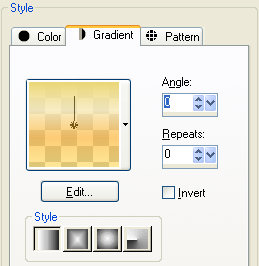
Properties foreground colour - material menu gradient - find your linear soul037.PspGradient or soul035.PspGradient in blue.
and place style - on Linear, with these settings
New transparent image 1024 X 768 px.
Flood fill #935811.
Flood fill with your gradient
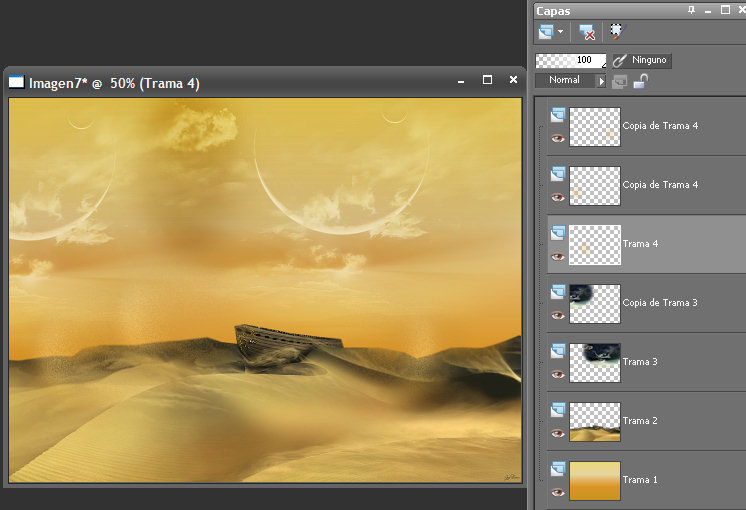
Open bhyma_arenas_10_09.pspimage.
Edit copy - close original
Edit paste as a new layer
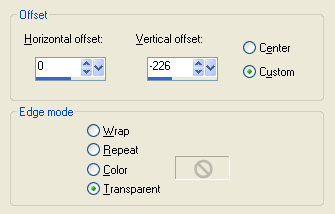
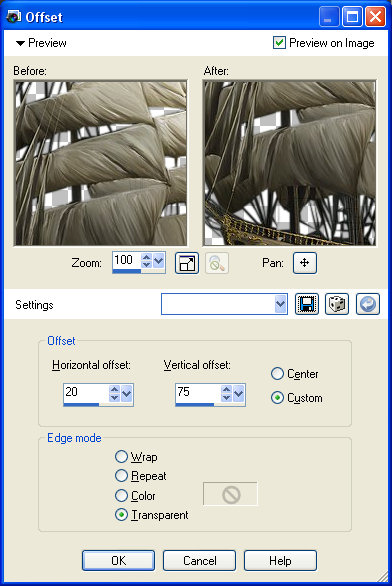
Effects – Image effects – Off set
Open bhyma_lunas_10_09.pspimage
Edit - copy - close original
Edit - paste as a new layer
Blend mode- soft light
Place on the top right.
Layers – Duplicate
Move to the left to cover the rest of the sky.
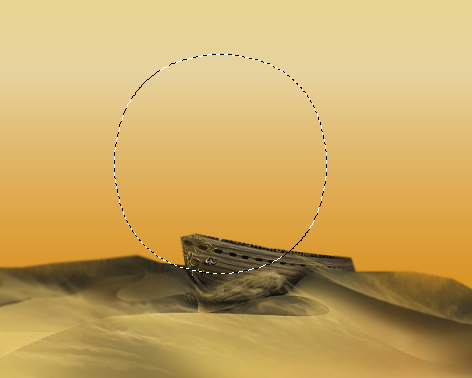
Layers - new raster layer
Activate the selection tool
Draw an ellipse on the boat as well:
Flood fill with your gradient
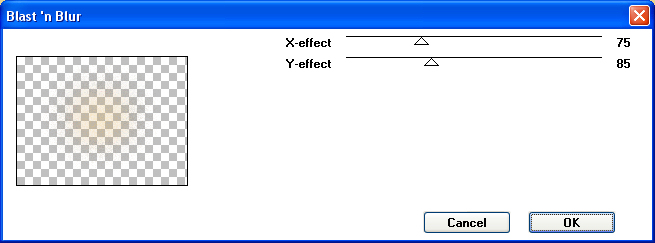
Effects – plug ins - Toadies - Blast' n Blur.
Layers – Duplicate
Activate your copy( Copy of Raster 4 )
Effects – Distortion effects - Warp
Image - resize on 50% all layer Unchecked
Place on the sand, pretending the wind.
Activate the layer
Effects – Distortion effects - Warp
Image - resize on 40% all layer Unchecked
Place on the sand across the boat.
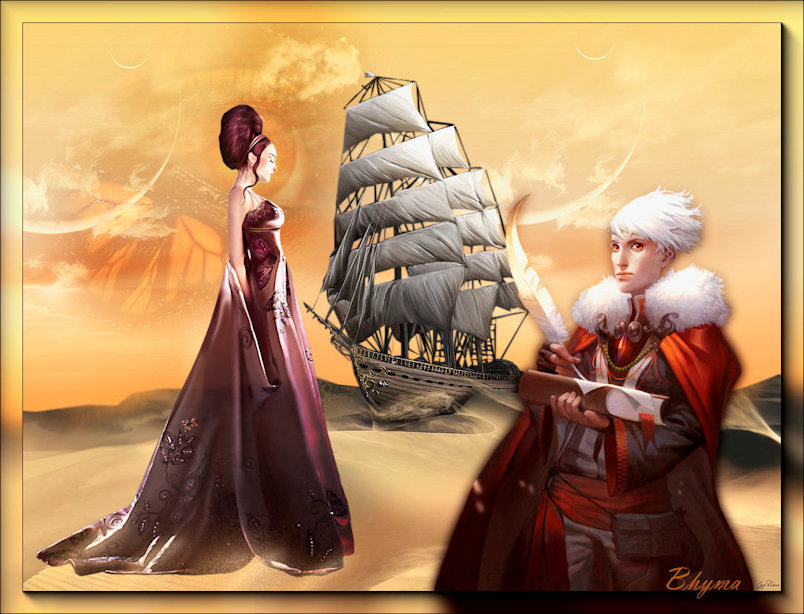
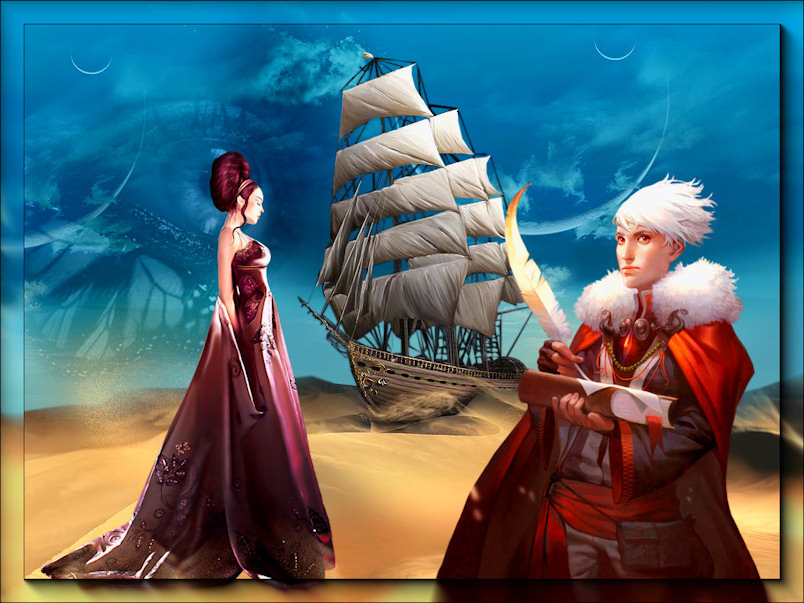
This is the result:
Open bhyma_unojo_10_09.pspimage.
Edit copy - close original
Edit - paste as a new layer
Place on the top left.
Blend mode- soft light
Opacity 75%.
Open bhyma_barcoenarena_10_09.pspimage
Edit copy - close original
Edit - paste as a new layer
Effects – Image effects – Off set
Open bhyma_escritor_10_09.pspimage.
Edit copy - close original
Edit - paste as a new layer
Image - Resize 70% all layer Unchecked
Place on the bottom right
Layers – Duplicate
Activate original, Raster 7.
Adjust - blur - gaussians blur: radius 12
Activar ahora la copia, la capa de arriba del todo.
Open bhyma_susurrodeotono_10_09.pspimage.
Edit copy - close original
Edit - paste as a new layer
Image - resize on 70% all layer Unchecked
Opacity 80%
Place the bottom left on the sand
Open arena.pspimage, y arenapeque.pspimage.
Put down on the edge of her dress to blend with the landscape
Layers - Merge - Merge All
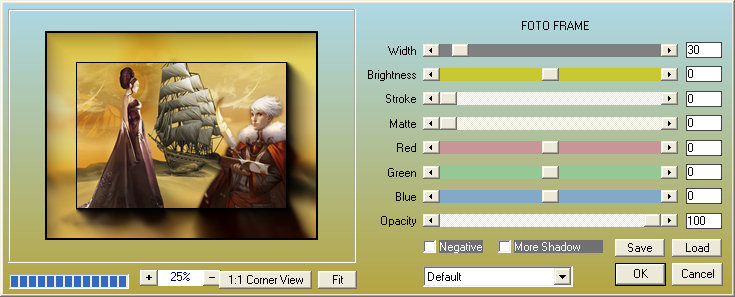
Effects – plug ins - AAA Frames - Foto Frame.Width 30.
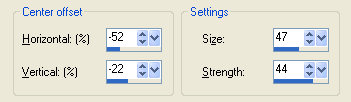
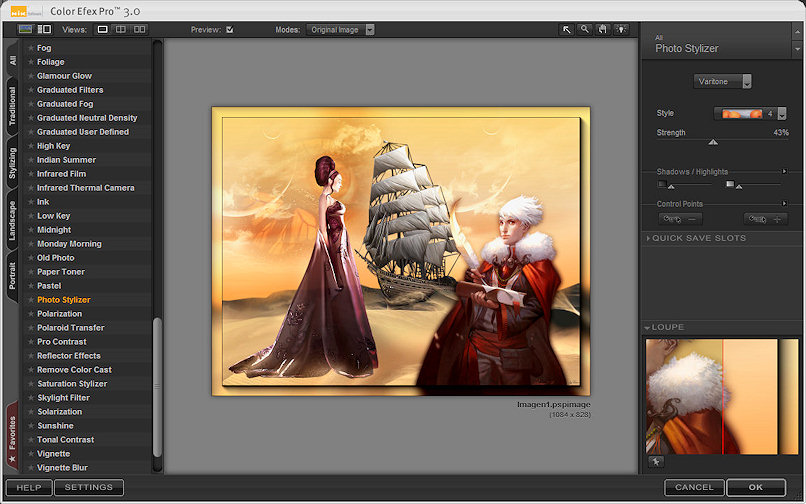
Effects – plug ins - Nik Software - Color Efex pro 3.0 Complete - Photo Stylizer.( Varitone - Style 4 )
Resize, I have put 804X614px
Sign and save your work as jpg
I hope you have enjoyed this tutorial
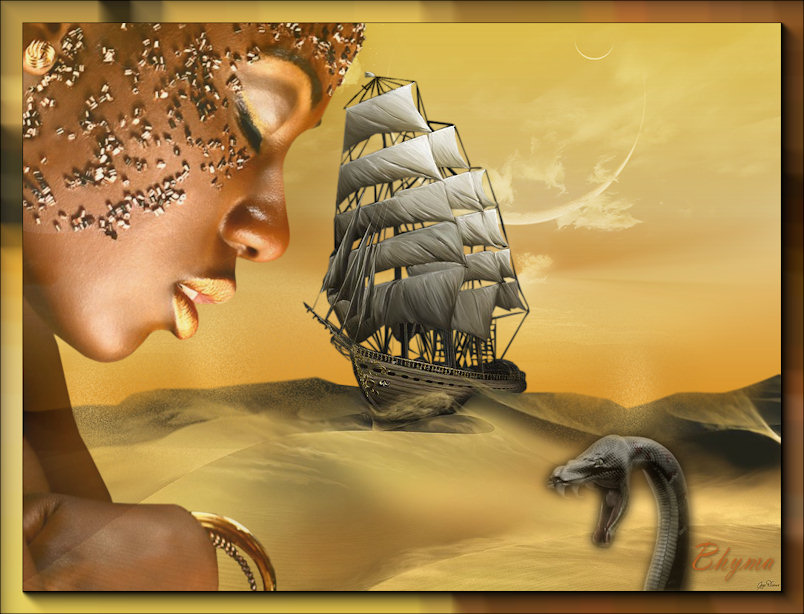
Another example