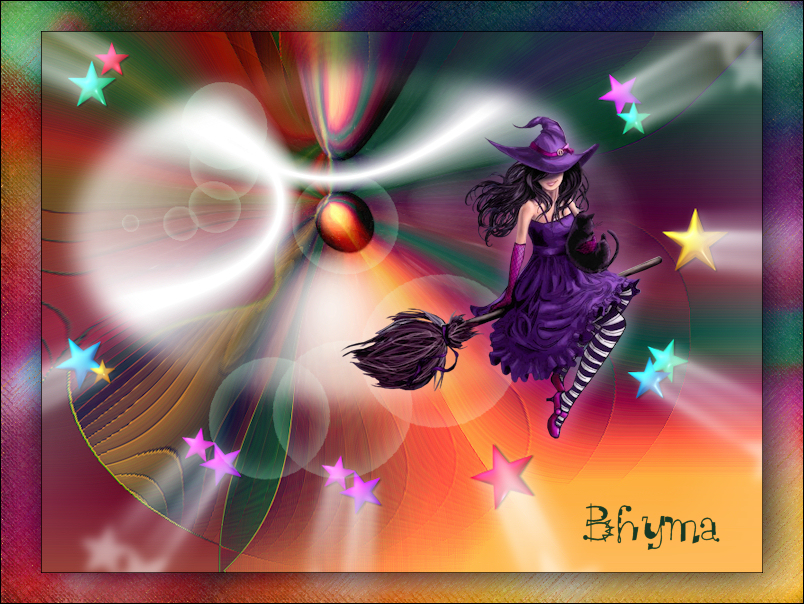
This lesson has been written by Bhyma on September 2009 in the Spanish version from PSP X2
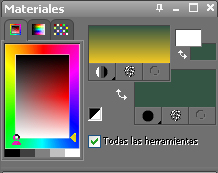
Materiales


Preparation:
Put your foreground color on white, and the background color on a #222939
Switch foreground color to gradient: alas.PspGradient
This gradient changes according to the background color, you can use a color from the tube if you want.
To start, our material palette looks like this:
1 - Open a new image: File – new – new image: 800 X 600 px.
2 - Flood fill with the gradient.
3 - Effects - Reflection effects - feedback, with these settings:
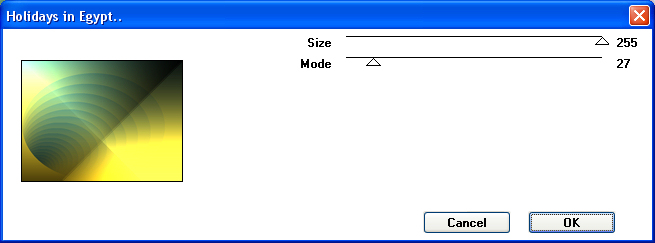
4 - Effects - plug-in - VM Extravaganza - Holidays in Egypt, with the following settings:
5 - Effects - edge effects- enhance.
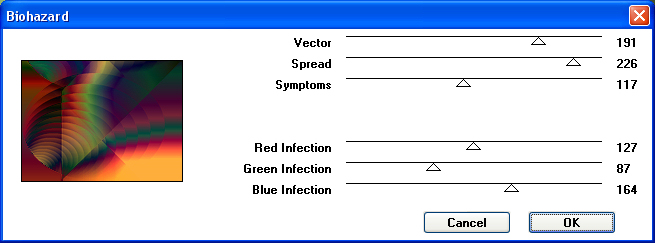
6 - Effects - plug-in - VM Extravaganza - Biohazard, with the following settings: ( Defaults )
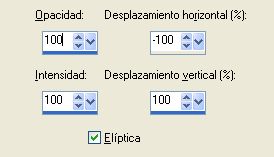
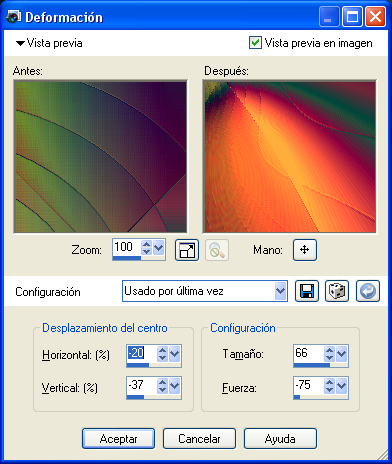
7 - Effects - distortion effects - warp with settings shown below:
8 - Window - duplicate, Put these image to the side, but do not close, you will still need them.
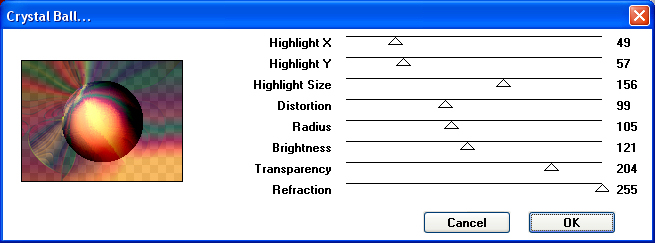
9 - Effects - plug-in - Cristal Ball with these settings:
10 - Effects - plug-in - Alien Skyn - Snap Art - Oil Paint with preset: alas.f1s
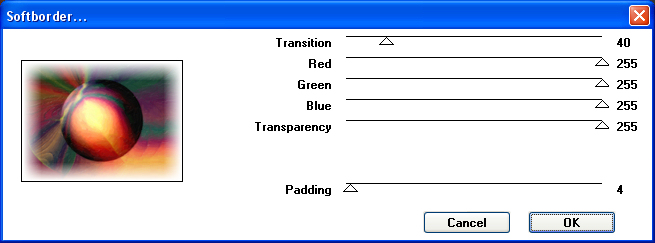
11 - Effects - plug-in - VM Toolbox - Softborder with these settings:
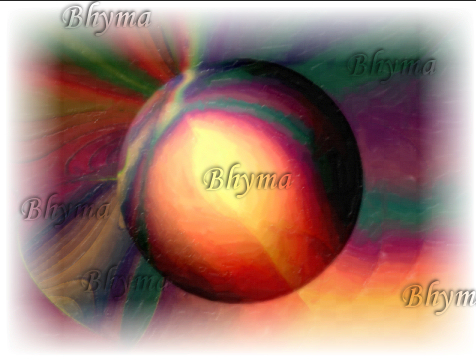
This is your result:
12 - Effects - distortion effects - Warp, same settings.
13 - Copy and paste the image as new layer that we saved in step 8.
14 - Selections – load/save selection from disc- load selection from disc and choose my selection: alas1.PspSelection.
15 - Pushes three times the delete key on the keyboard.
16 - Activate the layer palette and decrease the opacity of the layer to 85%
17 - Layers - new raster layer!
18- Selections - modify – Select selection borders, inside 8 px.
19 -Fill with white, thrice. (3 )#ffffff
20 - Selections –deselect all.
21 - Layers - new raster layer.
With the tool tubes, we will form around the ellipse, a circle of stars, looking for the tube From Corel X, X3 - Stars.
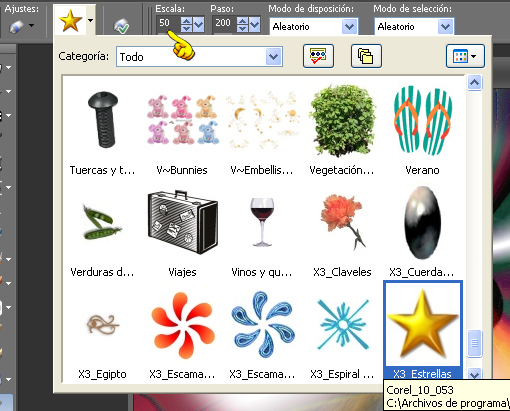
22 - Form a circle with the stars, at scale 50!!!!
23 - Effects - plug-in EC 5: Impact BackLight, on tab SETTINGS choose preset:Filled, Decreasing Opacity with Front Ghost.

24 - Selections – load/save selection from disc- load selection from disc and choose my selection: alas2.PspSelection.
25 - Flood fill with the background color. #365544.
26 - Selections - Modify - Fade 45, and then press the Delete key once.
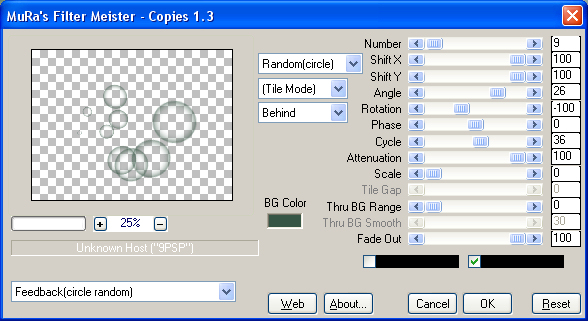
27 - Effects - plug-in - Mura´s Meister - Copies with settings shown below:
28 - With the Move tool move, until the area of colors in a bubble.
29 - Activate the layer palette, Blend mode Screen.
30 - Image –add borders 1 px black color: #000000.
31 - Layers - Duplicate.
32 - Activate background layer. Adjust - blur - Gaussian blur: radius: 10
33 - Image - Flip.
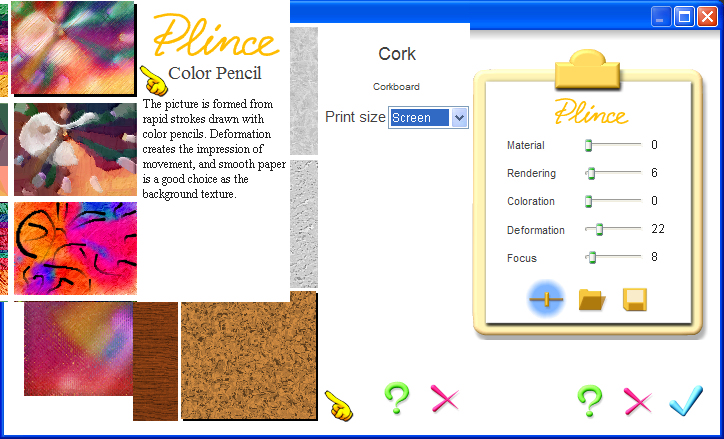
34 - Effects - plug-in - Virtual Painter 4. Plince , Color pencil, in Material: Cork Corkboard, Print Size=Scren. and with settings shown below:
35 - Activate the top layer, copy of background.
36 - Effects - plug-in - Eye candy 5 Impact - Perspective shadow, preset: alas_bhyma.f1s.
37 - Open the tube: 1Patries_HH35-vampire on stick-30-8-09.psp.
38 - Edit copy - edit paste as a new raster layer, Image resize 60% resize all layers Unchecked
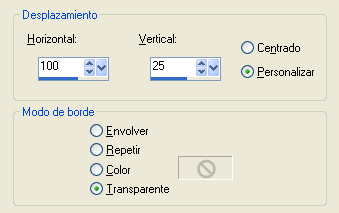
39 - Effects – image effects – off set: Horizontal 100, Vertical 25.
40 - Layers -Duplicate.
=41 - Adjust - blur – Gaussian blur: radius: 10.
42 - Layers - arrange – move down.
43 - Activate the layer palette, Blend mode Screen.
44 - Layers - merge - merge all layers. Save as a JPG
Animación:
1 - Duplicate the background layer to have three layers.
2 - Activate the background layer.
3 - Effects - plug-in - Xero Sparkles, white settings shown below:
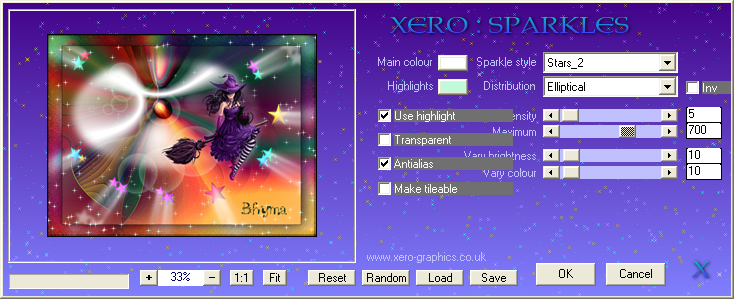
4 - On the first copy and repeat the effect by changing the intensity to 9, and the second copy change the intensity to 11.
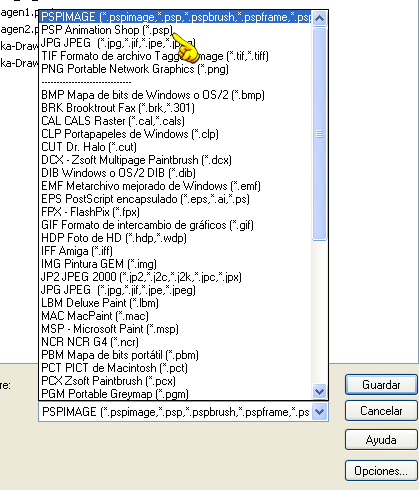
5 - Save as - image PSP Animation.
6 - Open the Animation Shop, and find the image you just saved.
7 - Check that the effect is fine, in See Animation.
8 - And save as gif.
I wish that you had a good time with this tutorial.
If you need to ask something, you can write here: 